
Where have I been?
So … hi there. How have things been with you? I’ve been away from this blog for a while, but don’t worry!: I haven’t been idle … not all of the time anyway.
Much of my time over the past 18 months or so has been focused on one single piece of work. This hasn’t been the only thing: I’ve appeared in a couple of talks on phylogeny at SVPCA and Progressive Palaeontology, and by ‘appeared in’ I mean ‘presented’. (I’ve recently updated my Academia.edu with the details of these.) Aside from those, my mind has been fixed on the taxonomy, I’ve written an overview as one of my early blog posts. This has now come together to form a monster of a manuscript that I’ve just submitted.
However, the fruits of that work aren’t what I’ll be talking about today. By ‘monster of a manuscript’, I mean some 250 pages of body text, plus many for references, captions, and index: 364 pages in total, and add on the figures and plates themselves too. (Note the Oxford comma there, which I have a new-found fondness for. Yes Mike, I realise that this is hypocritical considering the argument about it that we had last time we met.) This post, therefore, is about how I wrote this, and how I put it all together, or, more specifically, the computer programs that I used to do this. It, this post, may be a bit of a curiosity, but it’s a curiosity that I shall indulge myself in, much like my eventual post on typography (stay tuned!).
For those who can’t wait, or, potentially rightly, expect me to not write about this for a long time, you can find many interesting things on the Web. A few of my favourite places to look are Typographica, Typophile, and, of course, there is Wikipedia. Another interesting point is that I wrote this blog post using the type family Linux Libertine. Intended to be a superior replacement for Times New Roman, it succeeds at this very well. It is also free, includes glyphs for both Greek and Cyrillic, which I have used, and comes with compatible serifed (Linux Libertine) and sans-serifed (Linux Biolinum), display, and monospaced fonts.
Getting the words down
The first challenge is, of course, getting the words down. This assumes that you know what you’re writing about, and have the ability to do so: while this is typical for academic writings, it may not be the case in writing fiction novels, for example. This, in itself, is a very large can of worms, which I may address some day. Suffice to say: if you are doing a PhD, you’ve probably got this at least somewhat sorted.
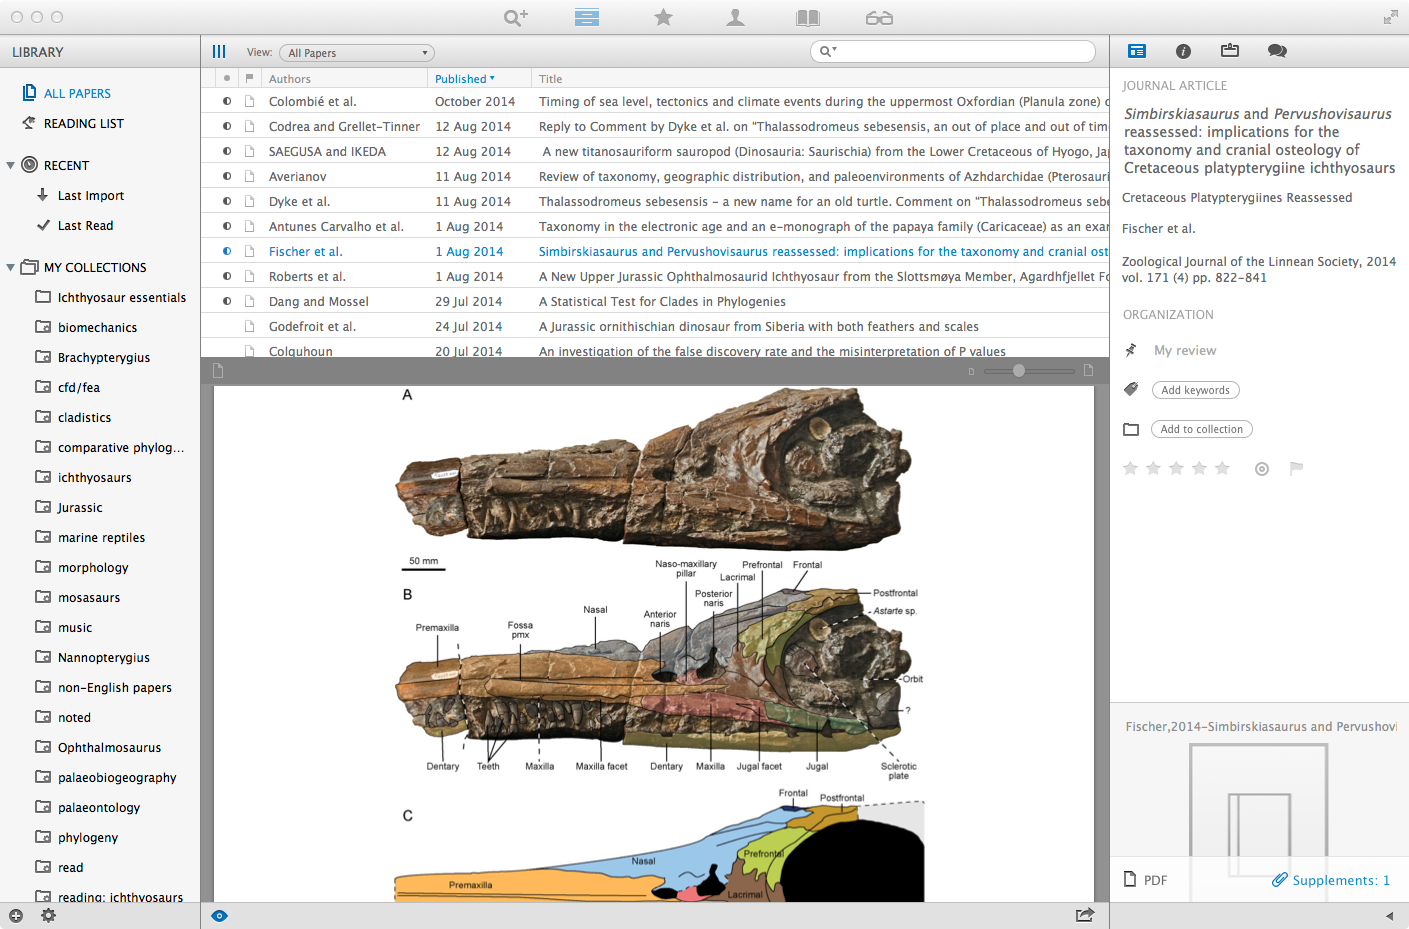
My work consisted of lengthy descriptions of several ichthyosaur taxa: going through each bone: describing its shape, what it joins to, and what’s around it. This is simple enough when you have the whole bone in front of you, but less so when it’s only a bit of it, and you’re having to compare it to a photo of another fragment that’s housed in a different museum.
However, that’s not where I’m taking this.
I dislike Microsoft Word. It works, yes (mostly; ooh! that’s a snide comment right there), but I find it difficult, and it does not work well with the way that I work. Doubtless there are many things I could do to improve my relationship with it; I’ve tried. I prefer Apple Pages as a word processor, but that is quite a bit more limited in extended functions. This is especially true for the most recent version. Maybe more features will be added?, but I’m not sure when or how well. Pages could be great: I found it highly useful for doing my undergraduate reports, essays, and dissertation. It has lost some of its sparkle since then. They both suffer, as I’ve realised since starting to write lengthy, bitty pieces, from being too linear: they excel at starting at the beginning, going towards the end.
Let me clarify. When writing lengthy descriptions, particularly when each section is on a specific bone, I found it helpful, and easier to write by jumping around: a bit here, a bit there, compare that with this, and so on. This was easily accomplished in the software that I used: Scrivener for Mac.
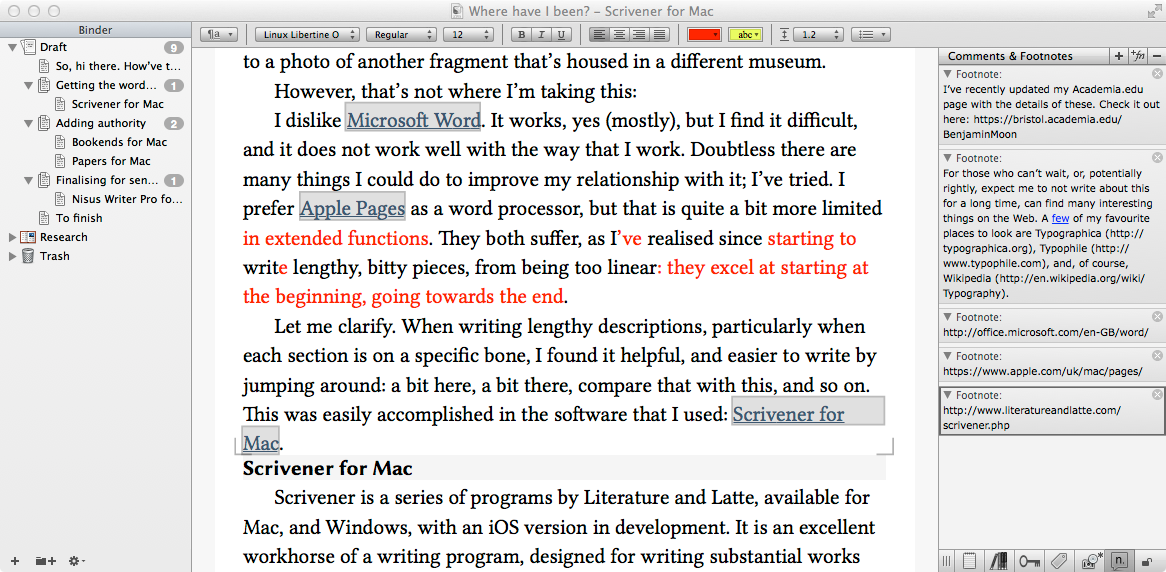
Scrivener is a series of programs by Literature and Latte, available for Mac, and Windows, with an iOS version in development. It is an excellent workhorse of a writing program, designed for writing substantial works especially, but also good at ‘lighter bites’, like this post.
What I like, and what I found most helpful in my writing, is that individual sections, or chapters, can be separated into their own files ad hoc and ad libitum. The project itself, the program’s term for the whole, is actually a folder, ‘package’ in Mac speak, that contains all of these separate text files, with the ability to add research files, web pages, and other things too. Visible in the binder, these files can be opened in any combination by Scrivener, with side-by-side views, and moved about at will; all controlled, organised, linked, indexed, and referenced by Scrivener. There are more things you can do that might be helpful in certain situations too: index cards, and scriptwriting, among others. As I hinted above: this program is for writers generally, not specifically for academic writing, but it most certainly does not suffer from being a Jack-of-all-trades, as Word does.
Being able to separate descriptions as one bone per file allowed me to focus only on that; useful when some of these descriptions spread to over 1000 words each. Another important feature is targets, which kept me going with something to aim for both for the day, and for the whole project. You can even tweet your progress, should you wish to do so. I didn’t make my original deadline by a long way.
Of course, writing into this software is no different than any other designed for the purpose: keyboard, screen, time, will (not all of these are all present all of the time). However, it is the way in which the program allows you to work with what you’ve written, both during, and afterwards.
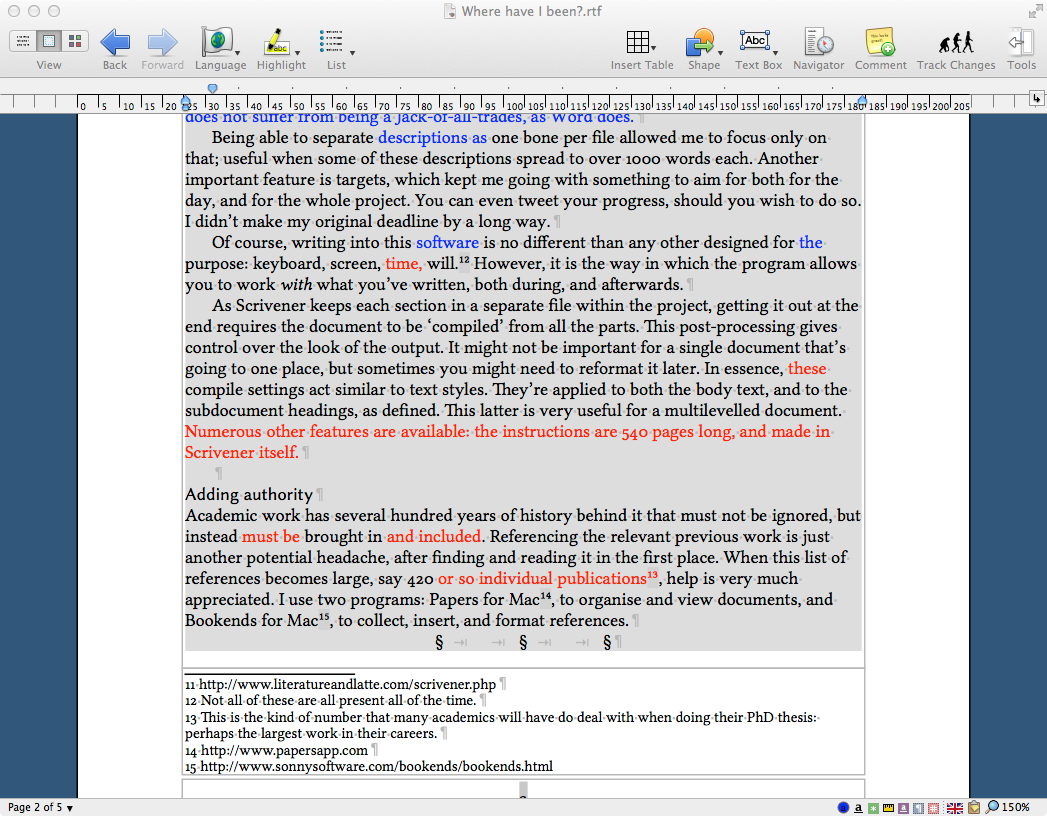
As Scrivener keeps each section in a separate file within the project, getting it out at the end requires the document to be ‘compiled’ from all the parts. This post-processing gives control over the look of the output. It might not be important for a single document that’s going to one place, but sometimes you might need to reformat it later. In essence, these compile settings act similar to text styles. They’re applied to both the body text, and to the subdocument headings, as defined. This latter is very useful for a multilevelled document. Numerous other features are available: the instructions are 540 pages long, and made in Scrivener itself.
Adding authority
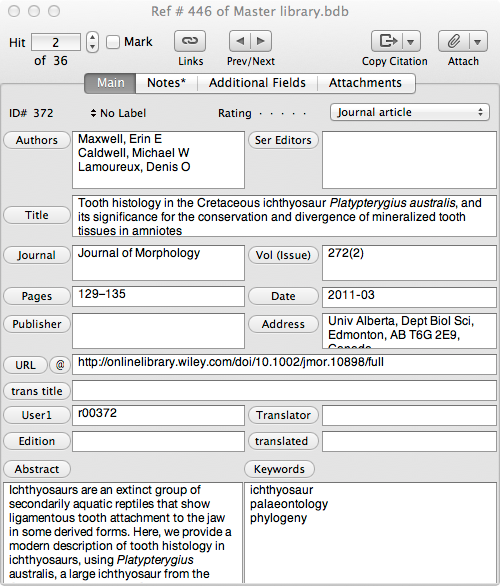
Academic work has several hundred years of history behind it that must not be ignored, but instead must be brought in and included. Referencing the relevant previous work is just another potential headache, after finding and reading it in the first place. When this list of references becomes large, say 420 or so individual publications, help is very much appreciated. (This is the kind of number that many academics will have do deal with when doing their PhD thesis: perhaps the largest work in their careers.) I use two programs: Papers for Mac, to organise and view documents, and Bookends for Mac, to collect, insert, and format references.
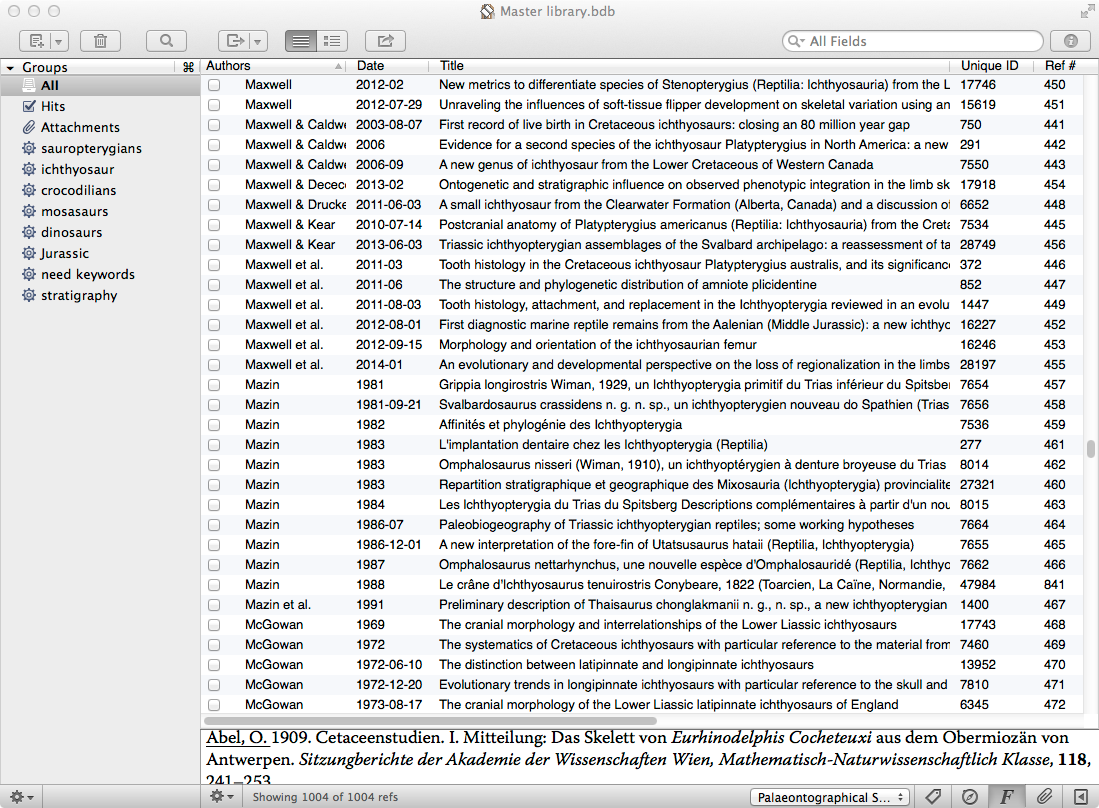
Bookends for Mac by Sonny Software contains the best set of import, export, and customisation options for references that I’ve found. I’ve looked at EndNote, Sente, and Zotero, as well as the Citations function of Papers too. (I used to use Paper’s Citations when I used Pages, and wrote the first version of the style format for the journal Palaeontology in the Citation Style Language, which is used by Papers, Sente, and Zotero. All of these allow you to change to format of both citations and the bibliography: which bits are included and their order, which are italicised or in bold, and so on. However, as many journals each have their own subtle differences in citation and reference formatting, it becomes difficult to cover all of these. (No reference assistant is perfect or complete, and most will require some tweaking at some stage.) Inevitably, it ends up being the small bits that are left over and have to be changed later: bibliography formatting is inevitably a time-consuming task. I’ve found that Bookends gives me those few more options, which that little less time having to be spent later: a generally more pleasant way to go.
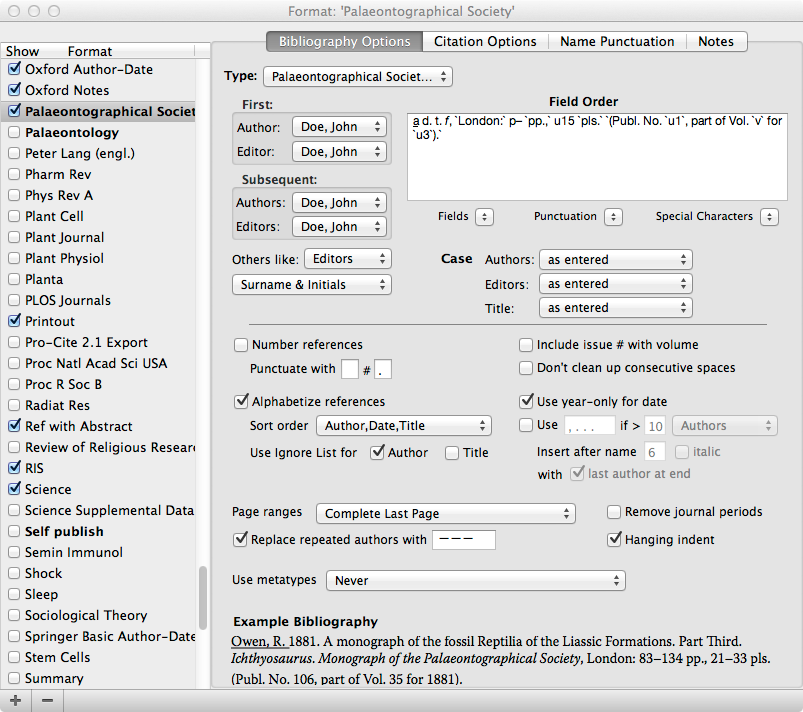
Nicely, citations are easy to add with Bookends: simply import a citekey into the file from its database. The formatting stage comes later, by using the program to process the file, taking all the citekeys, formatting the citations, and adding a bibliography. As it is text based, this means that Bookends can work with files from many programs: simply export, format, import. There are also very useful options for showing only the date, or not having brackets around, for instance. I’ve found that doing my formatting in Mellel, which has particularly close ties to Bookends (they are available together in a discounted software bundle), adds a bit extra in formatting control, again saving that little, or more, extra time. While each of these savings may only a second or two for each edit, in such a long document, with several hundred or thousands of citations, that easily adds up.
Papers for Mac by Mekentosj, now part of Springer, is a document manager, primarily for pdfs. Import a pdf file and the software copies it to the library, and, for research articles, will automatically search for titles, authors, source, and other reference metadata. The program then lets you search through the text, view the document, highlight, add notes, and add associated documents. These are all immensely useful: the bread and butter of an academic’s daily work. Papers simply takes markup that was done on paper offprints into digital form. It is not the only such document organiser, Preview allows markup, other software organises files. Yet, being able to view, annotate, and organise articles, with the associated metadata, search, and citation tools is hugely useful.
Finalising for sending off
My workflow usually goes a little like this: write in Scrivener, export as Rich Text File (.rtf), import into Mellel, format references with Bookends, format paper as needed (this is usually minimal as Scrivener can generally cover all the bases), export as .pdf, preferably, or .doc/.docx to distribute. I needed to add an index, however, and Mellel, unfortunately, doesn’t have this ability. (It’s one of the things that has been requested in the forums, and this has been acknowledged by the developers, so it may appear.) For this, I tried importing into Word, but this struggled with indexing such a large document.
The process itself was simple: create a list of words to index, with how they should appear, make Word mark these in the document, add the index to the end. (I followed the instructions from Dummies.com.) Word struggled with this, although wasn’t beaten, but made working with the document afterwards difficult: pages appeared to be recalculated on-the-fly, so that’s something else that the program has to do. (I’m not sure whether this is actually how Word does this, but the constant slowness and crashing suggests that it was doing a lot of extra work once the index had been added.) It was too much: Word repeatedly crashed, and became frustratingly slow to use. I searched for an alternative.
I settled on Nisus Writer Pro for Mac by Nisus Software. It has the tools I need and works primarily with .rtf files, how I mostly pass through my writing. Using the trial showed me how useful Nisus Writer Pro is. It can do all the things that I need it to do, and quickly. Processing an index and creating contents does not take long: the compiling takes some time to go through, but the creating takes only seconds. (The process to create the index is the same as in Word.) Both of these are also stored as text to be updated as needed: on demand processing reducing the general overhead. The styles and formatting options are those typically found in word processors, but their implementation, their usability, and the way that they look, not an unimportant thing in my world, are more pleasant than many others. (I am somewhat of an aesthete.) Nisus Writer Pro can, conveniently, read the change tracking on Word documents, as can Mellel, perhaps the final part of working with documents. The realisation of this too is, I think, finer than in Word.
To finish
Microsoft Word is a powerhouse of a program, both in terms of functions, and ubiquity. I use it, when necessary. (I have signed up to Office 365 University, so get the benefit of the programs and OneDrive.) Yet I am increasing finding that I do not need to.
I use a MacBook Pro, running OS X. I have seen others complain about Word on OS X. I have not used Word on Windows. On that platform, it could be excellent and worth the share that it has garnered. If so, why not also on OS X? I do know that there are things supported by the Windows version that aren’t found in Word for Mac, certain advanced typographical options being the one I know best. These, specifically OpenType feature support, have only recently found their way into any version of Word. I’ll leave for now the discussion of word processing versus typesetting programs. Maybe the next version will allay my griefs. For the Mac version of Office, the time of this to appear is nigh.
I do not think that the way I’ve found myself working is bad though. Using several great programs that do what they do well has perhaps served me better than lumbering on with one that I disagree with. My experience has been far from a hardship, even with the program swapping and file manipulation.
I have had occasional problems, but the instructions that come with the programs are extensive, comprehensive, and useful; not all of those are guaranteed! Moreover, the forums ( Scrivener, Bookends, Papers, Mellel, and Nisus) for each program are very helpful, and I’ve often been able to contact with the people who make these programs themselves.
Other blogs have talked about their experiences with these programs in their own projects. (In particular, I occasionally see posts about Scrivener appear in my Facebook feed: I follow them.) I urge you to look them up. Each has a trial option to, so why not try them. Some are cross-platform, and allow collaboration or working with documents as such, across many computers.
I don’t think there are many places to find how academics work. My immediate thought turns to the blog Academic workflows on a Mac by Aleh Cherp: on this blog, Aleh has reviews, thoughts, and personal workflows. This is a great place to see how things can work together to get things done. It may not suit everyone, not least because of the differences between research topics and methods. I’m curious whether anyone else has written about this, or what different processes other people use.
Leave a comment